Cheap 'n'
Easy Batch Sparge Brewing
Revised 4/2/08 - revisions in boldface Italics
Some homebrewers aspire to someday go pro. Some homebrewers like to use pro style systems and techniques for their homebrewing endeavors. Some homebrewers get their kicks from designing fancy automated systems for the brewing. Not me....I like the simple, hands on approach to brewing. Kind of the same way you think of cooking. For me, it’s “Cheap ‘n’ Easy” batch sparge brewing.
What is sparging and how do you do it?
Sparging is the rinsing of the grain bed to extract as much of the sugar from the grain as possible without extracting mouth puckering tannins from the grain husks, says John Palmer (How to Brew, John Palmer 2nd Edition 2000, 2001). We’ll further specify that sparging begins only after runoff of the sweet wort from the mashtun has begun. Otherwise, there would be no such thing as no-sparge brewing, which we’ll get to in a minute.
Fly Sparging
The usual way most brewers sparge is continuous (also called on the fly, or fly) sparging. In this method, after vorlauf, the wort runoff is begun and water is added to the mash tun at the same rate as the runoff. It’s important to go slow so as to extract the maximum amount of sugar and not compact the grainbed, which would stop the runoff. Lauter design is also highly important in fly sparging. Your lautering system must allow no channeling, or the sparge liquor will “drill” straight down through the grain bed in only one or 2 locations and leave the rest of the mash unrinsed. Because the buffering power of the grains in the mashtun is continually being diluted by the sparge water, it’s necessary to monitor the pH of the runoff. Too high a pH will cause the extraction of tannins and polyphenols, compromising the quality of the beer. To counteract this, it is often necessary to acidify the sparge water to keep the pH of the runoff below 6. Because the runoff may take an hour or more, many brewers do a mashout step in an attempt to denature the enzymes and prevent further conversion from taking place while the sparge is happening. However, this method will usually yield the highest extraction from the grain.
No Sparge Brewing
As described by John Palmer in his BYO article “Skip the Sparge” (May-June 2003), a no sparge brew has the entire volume of “sparge” water added to the mash and stirred in before any runoff has taken place. Even though additional water has been added, since it’s been added to the mash before runoff has begun, we can more properly think of it as a mash infusion, rather than a sparge addition...hence the name “no-sparge”. This method is the easiest way to mash, but at the expense of poor extraction, typically 50%. The advantage, though, is that because all the sugar from the mash is in solution from the agitation of adding the water, lauter design has minimal effect.
Batch Sparging
Batch sparging is like partigyle brewing or the English method described in Palmer’s How to Brew, but instead of a separate beer being made from each runoff, the runoffs are combined into a single batch. In batch sparging, mashing is done at the normal ratio of anywhere from 1 to 1.3 qt./lb. After conversion, the sweet wort is recirculated as normal and the mashtun is completely drained as quickly as possible (NOTE:quick draining is a benefit, not a requirement, of batch sparging. I recommend you start the recirculation with the valve just cracked open, to set the grain bed correctly. After you return the vorlaufed portion to the mash tun, you can open the valve whatever amount works for your system), and an addition of sparge water is added. This is stirred into the mash, and after recirculation is once more drained as quickly as the system will allow. Sometimes, multiple batches are added if necessary or an additional infusion is made before the first runoff is begun. The advantages of batch sparging are no (or reduced) worries about pH because you’re not continually diluting the buffering power of the grains, inefficient lautering systems don’t really affect the extraction rate since the sugars from the grain are in solution, a mashout is seldom necessary (though may still be desirable) since the wort will be in the kettle more quickly and enzymes denatured by boiling, and extraction rates that range from slightly less to slightly more than fly sparging. The more inefficient your lautering system is for fly sparging, the bigger the gain in extraction you’ll see from batch sparging.
Formulae and definition of variables
Most of the following is
drawn from and builds on the work of Ken Schwartz (Ken Schwartz, “A
Formulation Procedure for No-Sparge and Batch-Sparge Recipes”-http://home.elp.rr.com/brewbeer/files/nbsparge.html)
and Bob Regent (Bob Regent, “Batch Sparging”-http://bayareamashers.org/maindocs/BatchSparging.htm).
The main concept we’re going to be working with is that for the best
efficiency, the runoff volumes
from your mash and batch sparge should be equal. In order to do that, it’s
sometimes necessary to infuse your mash with extra water before thefirst
runoff. Here’s how it works...
R1=initial runoff volume
which = mash water volume - water absorbed by grain
(assumed to be .1 gal./lb. for
this example since that’s the way my system works...use your own figure)
S= batch sparge water volume
V= total boil volume (amount in
needed in kettle for boil)
I=volume of infusions for a step
mash
R1+I+S(1)+S(2)+S(etc.) must
equal V
AND
R1+I=.5V
Let’s see how this works in a brewing session. Assume a recipe with 10 lb. of grain, and that you need to collect 7 gal. of pre boil wort. A mash ration of 1.25 qt./lb. would require 12.5 qt. or 3.125 gal. of strike water. Based on an absorption of .1 gal./lb., the mash would absorb 1 gal. of water so we’d get 2.125 gal. of water from the mash. Since we want to collect 3.5 gal. (or 50% of the boil volume), after the mash is complete we’d add 1.375 gal. (5.5 qt.) of water to mash tun before the first runoff. Stir the additional water in, let it sit for a few minutes, then vorlauf until clear and start your runoff. After the runoff, we add 3.5 gal. of batch sparge water. Stir it in well, then vorlauf and runoff as before. These two runoffs will give us our pre boil volume of 7 gal. of sweet wort.
Now, let’s take a look at how to build the equipment and do a brew session!
Building the Mashtun
For the mashtun, you’ll
need a cooler. I prefer the rectangular ones. The large top opening
makes it easier to stir the mash than a round cooler does. Since grain
bed depth makes practically no difference in batch sparging, one of the main
reasons people use the round coolers is nullified. The rectangular ones
are also cheaper. You’ll also need a rubber bung for a minikeg, some
1/2 inch ODx3/8 inch ID food grade vinyl tubing long enough to reach from
whatever you set your cooler on to the bottom of your kettle PLUS 6 inches, an
inline nylon valve, and a length of water supply line with a stainless steel
braid for a jacket, and 3 hose clamps. The length of the water supply
line doesn’t really matter. I use one that’s long enough to run
the length of the cooler, but my experiments have shown that shorter ones seem
to work as well. Feel free to substitute parts if you’d like
something a little snazzier. The only really crucial piece of the whole
setup is the stainless hose braid, so if you want to put a fancy ball valve or
something else on your mashtun, go for it!
NOTE: The minikeg bung
fits snugly into the hole left from removing the drain in most of the 48-54 qt.
coolers I’ve checked. If the fit is loose, or you’re worried
about leakage, apply some food grade silicone sealant on the flange before
inserting the bung into the cooler. Be creative!
Step by Step
1.) Remove the spigot from
the cooler. Usually, there’s a nut on the inside of the cooler
holding the spigot on. Unscrew that and the spigot should pop right out.
2.) Remove the plastic insert
from the hole in the minikeg bung, and insert the bung into the spigot hole,
from the inside of the cooler. The beveled edge of the bung goes in
first, and the flange of the bung should end up flush with the cooler wall.
3.) Cut off a 6 inch piece of
the vinyl tubing and, from the inside of the cooler, insert it into the hole in
the minikeg bung. Let a couple inches of tubing protrude from each side
of the cooler.
4.) Cut the threaded fittings
off the water supply line (I use a hatchet). Pull the tubing out from the
braid, leaving you with a hollow length of hose braid. Flatten the last
inch or so of one end of the braid. Fold it over on itself 3 times to
seal the end. Squeeze the fold with a pair of pliers to crimp it closed.
5.) Slip a hose clamp over the
end of the braid, and slip the braid over the end of the vinyl tubing INSIDE
the cooler. Tighten the clamp until snug, but don’t squeeze the
tubing shut! photos 2nd row #2 and #3
6.) Insert one end of the valve
into the tubing on the outside of the cooler and secure it with a hose
clamp. Slip another hose clamp over the end of the long piece of tubing,
connect the tubing to the output side of the valve, and secure with the hose
clamp.
That’s it! You’ve
built your Cheap ‘n’ Easy mash/lauter tun! Now, let’s brew
some beer!
Brewing Your First Batch Sparge Beer
Let’s walk through an actual brew session. This is from a 8 gallon batch of altbier I brewed recently. Remember that the method can be used with any brewing system or equipment. I’m going to describe how to do it the “Cheap ‘n’ Easy” way.
The equipment you’ll
need is:
Your converted cooler mash tun
a pot to heat water in (5 gal.
minimum recommended)
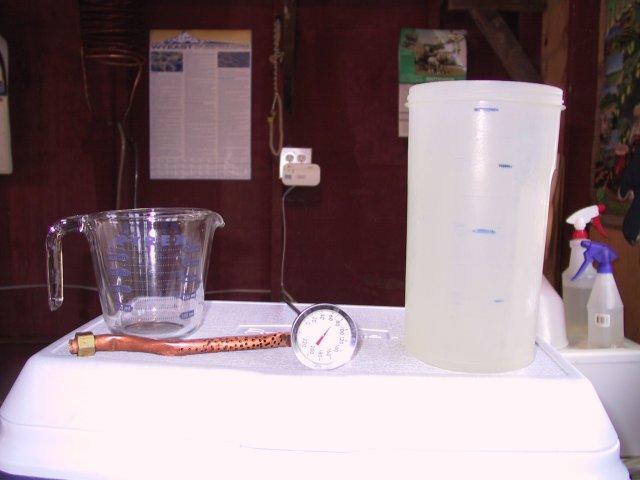
a 1-2 qt. heatproof pitcher
(preferably unbreakable)
your regular brewing
equipment-thermometer, boil kettle, and whatever else you normally use
In the photo
you can see my cooler, converted keg boiler, a 7 gal. aluminum pot for heating
water, a thermometer, a 2 cup Pyrex measuring cup, a 1/2 gal. plastic pitcher,
and the pickup tube for my kettle.
The things that you need to know to figure your water volumes are:
Total grain weight - in this
case, 19.3 lb.
Strike water volume - in this
case, 1.24 qt./lb or 6 gal.
Absorption of water by grain -
in my system, it’s 10 lb. of grain absorbs 1 gal. of water. Some
systems absorb 1 gal. for 8 lb. If you don’t know your absorption
volume, measure your first runoff volume the first few brews. By knowing
how much water you put in and how much wort you got out, you can easily figure
your absorption. Preboil volume - how much sweet you need to start
with. For this batch, we want 10 gal.
OK, we’re ready to brew!
1.) Mash in with 6 gal. of water for 1.24 qt./lb. I use the pitcher to pour water from the 7 gal. kettle (4th row 1st photo) until the kettle is light enough to lift and pour the rest of the water in. I predict that the grain will absorb 1.9 gal., so I should get just about 4 gal. out of the mash.
2.) Since I’d like to get 5 gal. out of this runoff, I infuse with 1 gal. of water at the end of the mash, before the first runoff. I add boiling water to get as close to the 168F mashout temperature as I can and stir it in.
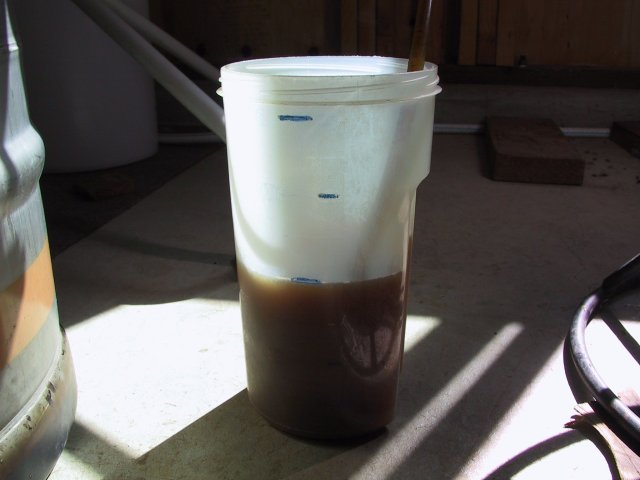
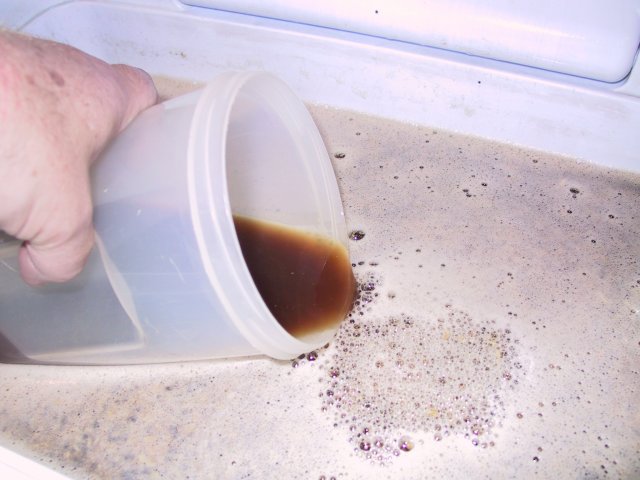
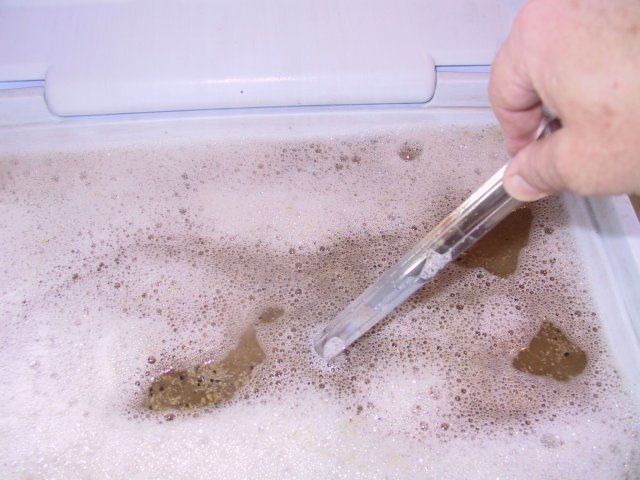
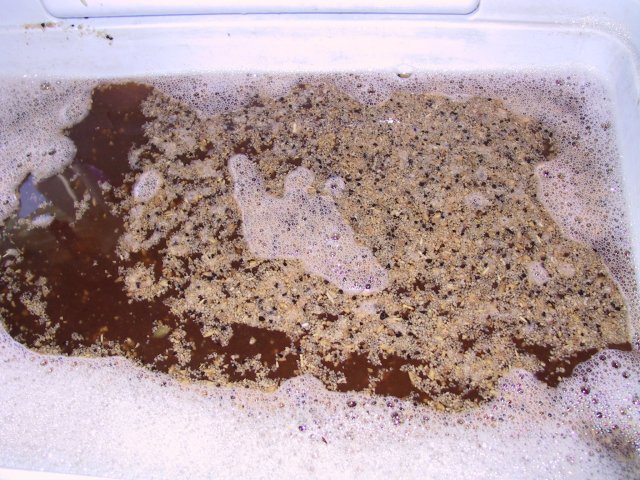
3.) I begin to recirculate the mash by draining into the pitcher (5th row 1st photo). I only open the valve partially at first, then as the runoff clears I open it up fully. With the hose braid, I usually only have to drain about a quart or so until it’s clear. Keep draining and recirculating until the runnings are clear and free from pieces of grain.
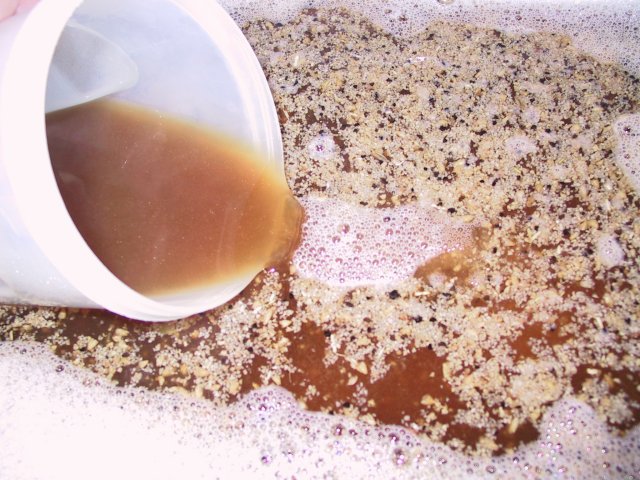
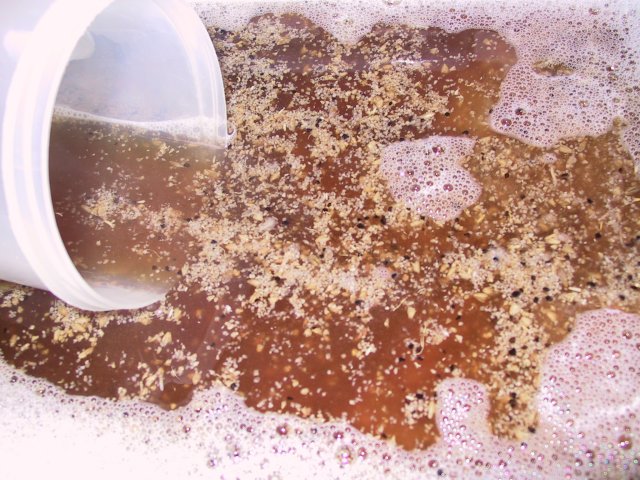
4.) Once the runnings clear, direct the runoff to your kettle, and slowly pour the contents of the pitcher back over the top of your mash.
5.) Completely drain the mash tun as fast as your system will allow.
6.) As the first runoff progresses, start heating your batch sparge water. In this case, we’re going to heat 5 gal. to about 185F to try to get to a grain bed temperature in the 165-168F range.
7.) When the first
runoff is done, close the valve and once again use the pitcher to add your
sparge water until the pot is light enough to lift. Then pour the rest
in. Stir the mash thoroughly.
8.) Go through the recirculation and draining process again, once more draining the cooler as fast as your system will allow.
9.) Continue the brewing
process as you usually do
Congratulations...you’ve
batch sparged! Like anything else in brewing, it may take a couple tries
before you get everything figured out completely. But with batch
sparging, you can brew all grain beers with a minimal investment in equipment,
and a pride in the hands on fun of brewing.
BREWING WITH
DENNY
click on a pic to view
a larger image
This system is designed and optimized for batch sparge brewing. I typically get 75-80% efficiency. While the basic design could be used for fly sparging, the single hose braid in the cooler would encourage channeling and lower the efficiency.
Equipment

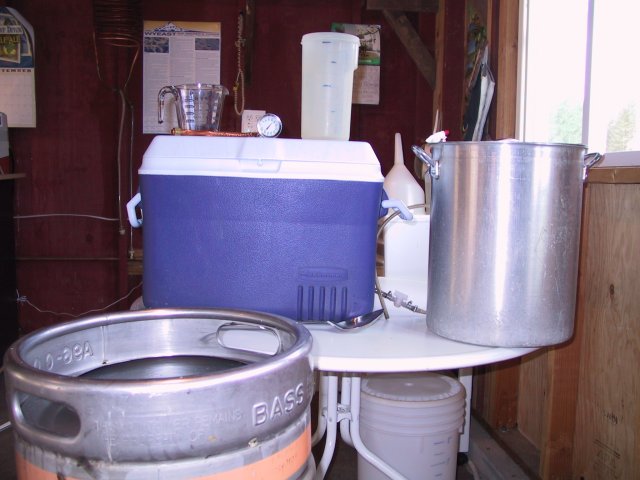
Converted keg on floor, 7.5 gal. aluminum pot on 170K BTU propane burner, 48
qt. Rubbermaid cooler on table with spoon in front
On top of cooler:2 cup Pyrex measuring cup, cooper pickup tube for kettle,
thermometer, 2 qt. plastic pitcher
Cooler Detail
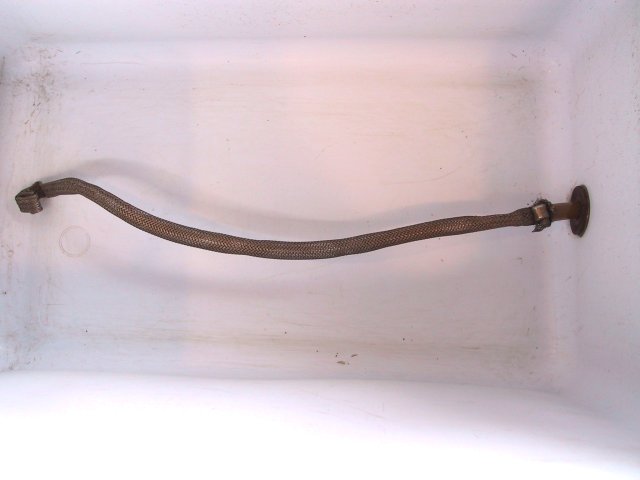
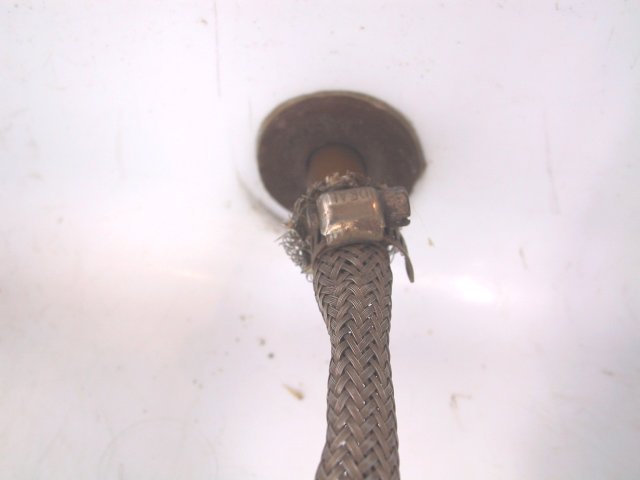


left to right: Stainless steel hose braid running length of cooler, minikeg
bung inserted in in spigot hole with tubing through it and braid clamped to
tubing, another view of the same, exterior view with tubing through bung
clamped to valve, output of valve clamped to tubing to runoff to kettle
Kettle Detail
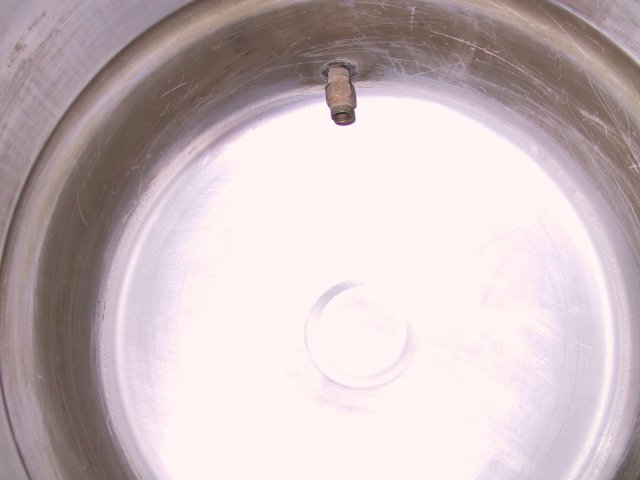

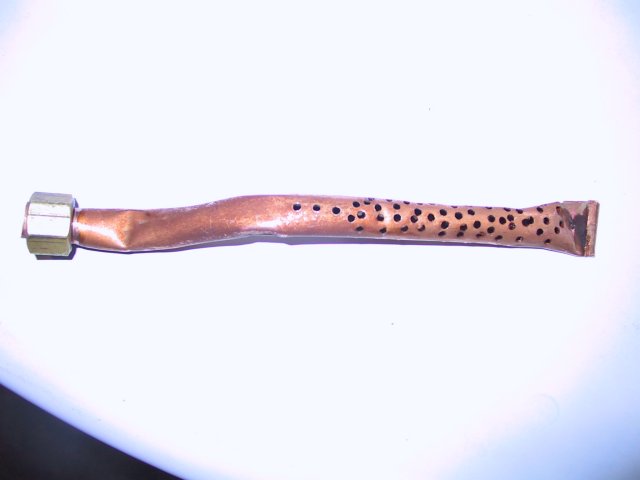

left to right: nipple on interior attached to 3/8" ball valve on exterior,
pickup tube showing bend, holes, and compression fitting, view of tube from
bottom, tube attached to nipple
Mash and Batch Sparge

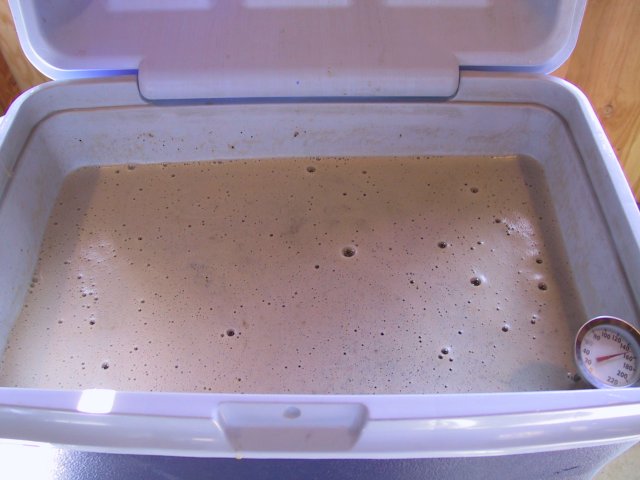
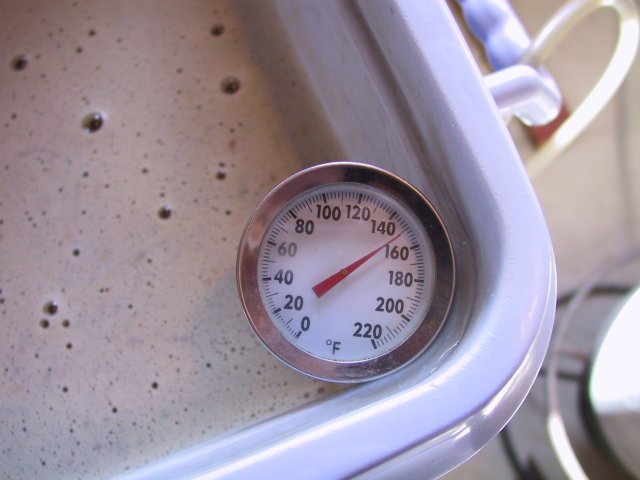
left to right: I heat water in the 7.5 gal. kettle and use the pitcher to
transfer it to the cooler until the kettle is light enought to lift and dump in
the rest. I stir the mash for 5 min. or so until temp. reading from
various places in the mash are consistent. I was going for a 150F mash
temp. on this batch of alt...I did pretty well!
After the mash is complete, I vorlauf (recirculate) by running off into the
pitcher until the sweet wort runs clear. Using the hose braid, it never
takes more than 2 qts. to clear and 1 qt. is more usual. I then direct the
runoff into the kettle, and gently pour what's in the pitcher back over the top
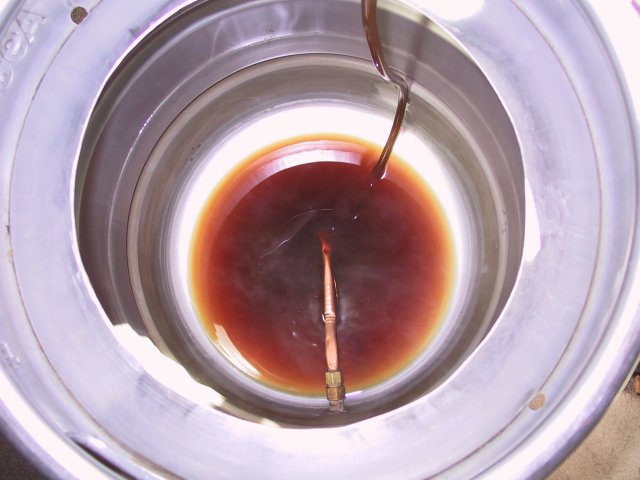
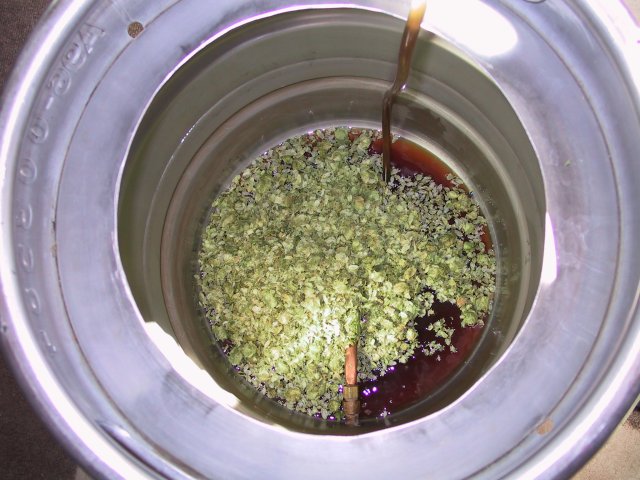
of the mash. In the picture at the right, the first wort hops have been
added.


As the first runoff progresses, I heat batch sparge water in the 7.5 gal.
kettle. After the first runoff, I add the sparge water like I do the mash
water, using the pitcher until the kettle is light enough to lift. I use
185-190F sparge water, which gives me a grain bed temp. of 165-168F.
I stir the water in well to make sure all the sugar is in solution, then I
vorlauf as I did for the first runoff and start the boil.